The Complete Guide to Installing Rounded Corner Beads on Drywall
Installing rounded corner beads is a great way to give your drywall a modern, sleek look. The smooth rounded edges create an attractive finish that stands out from traditional 90-degree corners. While square corner beads are the most common, rounded corner beads offer unique benefits that make them worth considering for your next drywall project.
We'll cover proper materials, step-by-step installation instructions, design considerations, and tips for avoiding common mistakes. Whether you're a DIYer or a professional contractor, this guide will help you achieve flawless results.
Step-by-Step Installation
Preparing the Surface
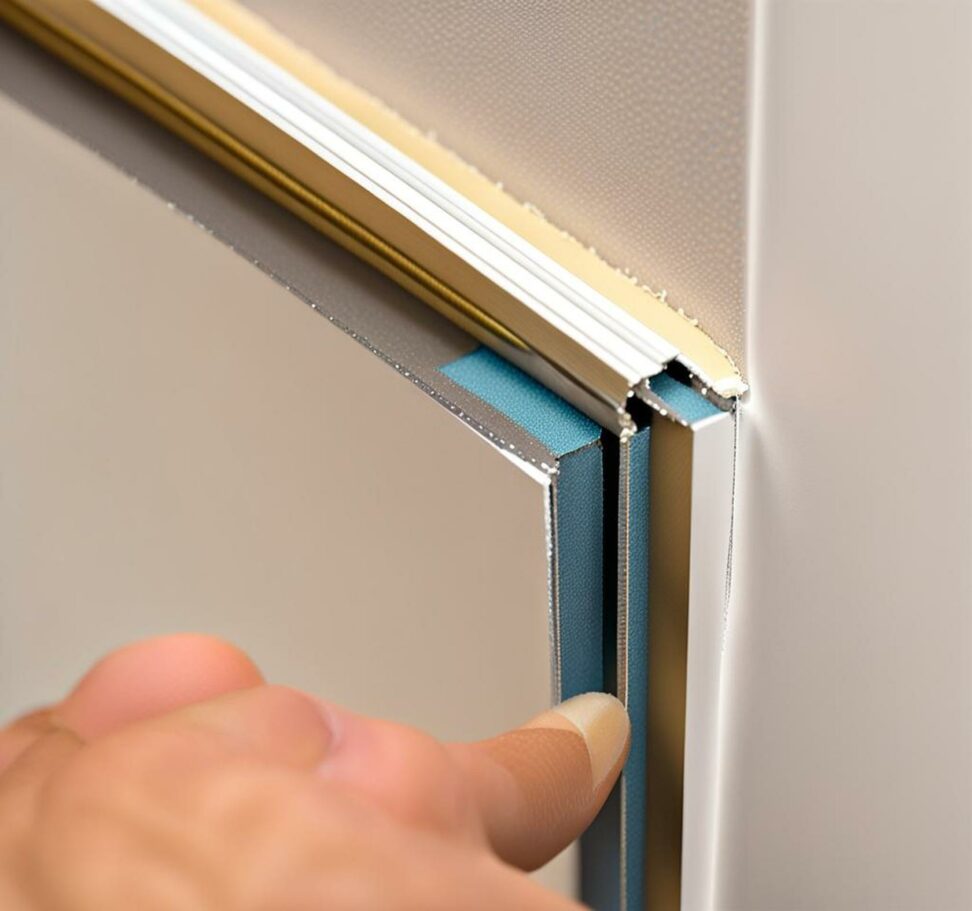
Proper surface preparation is key to ensuring rounded corner beads adhere properly. Start by inspecting the drywall corner and ensuring it's smooth. Use a utility knife to cut back any protruding drywall so the corner is uniform. This exposes the corner framing and allows the beads to sit flush.
For the best results, apply a thin coat of drywall joint compound to the corner and let dry. This fills any imperfections and provides a uniform surface for the corner beads to bond to. Take care to keep the compound smooth and free of ridges.
Measuring and Cutting the Corner Bead
Measure the total length needed for each corner. For clean finishes, use a single long piece rather than joining multiple corner beads. Use tin snips to cut plastic rounded corner beads to length. Make sure cuts are straight and smooth.
To save time, you can buy corner beads already cut to common lengths like 8 ft. and 12 ft. For specialty sizes, measure precisely and add an extra 1/4 in. to allow room for adjustments during installation.
Securing the Corner Bead
Starting 1/8 in. from the ceiling and floor, press the rounded corner bead firmly onto the drywall corner. Ensure it sits flush without any gaps. Use a level to double check alignment.
Fasten the bead using 1 1/4 in. drywall screws or nails, spaced 8-10 inches apart. Pre-drill holes to prevent splitting plastic beads. Drive fasteners into framing or drywall at slight angles to keep the bead flush.
Work methodically and check alignment often. Uneven sections can be re-aligned by removing and re-fastening the screws. Trim excess length with snips.
Applying Joint Compound
Embedding joint tape into the first layer of compound creates a strong bond and prevents cracks. Press fiberglass mesh tape into the corner using a drywall knife. Smooth the compound over the tape carefully.
Apply a second coat to fully cover the tape when dry. Feather out the compound several inches wide and smooth evenly. Allow thorough drying between coats.
Finish with a third, thin layer to create a seamless surface. Glide the knife along the rounded edge to blend smoothly. Avoid excessive pressure which can alter the shape.
Sanding
Once completely dry, perform light sanding with fine 120-150 grit sandpaper. The goal is to remove any ridges, not round down the edges. Take extra care when sanding the bullnose to maintain its shape.
A quick scuff sand followed by a wipe with a damp sponge is often sufficient. Be sure to remove all dust before priming and painting.
Priming and Painting
Priming ensures paint adheres uniformly to the finished surface. Use high-quality drywall primer suitable for rounded corners. Allow to fully dry before painting.
When painting, use a brush to apply paint onto the rounded bullnose edge. Then immediately roll over the adjacent flat surfaces. This pushes paint into the curve for a smooth, professional look.
Applying two finish coats ensures full coverage and provides protection. Allow thorough drying between coats. Finally, admire your newly installed, flawless rounded corner beads!
Material Options
Rounded corner beads are available in a variety of materials including:
- PVC plastic
- Paper-faced metal
- Galvanized steel
- Stainless steel
- Vinyl
Plastic PVC and vinyl corner beads are preferred for drywall applications. They won't bend, dent, or rust over time. Paper-faced metal beads are prone to cracking and peeling.
For high-moisture areas, choose moisture-resistant vinyl or stainless steel rounded corner beads. Galvanized steel offers durability at a lower cost but can eventually corrode.
Benefits of Rounded Corner Beads
There are several good reasons to choose rounded over square corner beads:
- Sleek, modern aesthetic
- Increased durability
- Easier to clean and maintain
- Safer, with no sharp corners
- Reduces echo and noise transmission
- Custom sizing and finish options
The smooth rounded profile gives a contemporary, upscale look popular in new construction and remodels. Durability is improved by eliminating vulnerable 90-degree seams.
Rounded corners are also safer in high-traffic areas and households with small children. And the lack of hard edges helps minimize noise transmission between rooms.
Rounded vs. Square Corner Beads
While installation is largely the same, there are some key differences between rounded and square corner bead options:
- Rounded beads require a bit more clearance for drywall screw heads
- They can distort more easily if fastened unevenly
- Bullnose edges limit wall space in corners
- Square beads maintain true 90-degree angles
When choosing between the two, consider the design and functional needs. Rounded corners work well for most drywall applications. But square beads may be better for tight spaces requiring maximum corner room.
Common Installation Mistakes
Paying attention to detail helps avoid problems down the road. Some common mistakes include:
- Incorrectly measuring and cutting lengths
- Uneven fastening leading to distorted corners
- Applying insufficient joint compound
- Over-sanding which can crack seams
- Allowing damage during other construction
Rushing through steps like measuring, cutting, and screw placement often results in uneven finishes requiring rework. And inadequate joint compound leaves gaps that crack over time.
Here are some pro tips to ensure your rounded corner beads look flawless:
- Maintain a consistent reveal depth from wall to bullnose edge
- Take extra care to minimize irregularities in curved edges
- Strategically place screws to hide seams and fastener heads
- Tape edges and protect installed beads from other construction mess
- Caulk along top and bottom edges for a seamless transition
- Apply primer and paint with high quality brushes and roller
Getting clean, smooth paint lines between the drywall and rounded edge can be tricky. Use quality tools and take your time to get results like the pros.
It's very easy to install rounded corner beads on the wall. The finished look is well worth the extra effort. Follow the techniques in this guide and you'll get professional-looking results!