Revive Your Outdated Kitchen on a Budget
Is your kitchen stuck in a design time warp? Are you tired of looking at outdated cabinets, chipped counters, and appliances from another era? We certainly know the feeling. Like many homeowners, we found ourselves living with a kitchen we no longer loved.
But giving your kitchen a major overhaul can cost tens of thousands of dollars. Who has that kind of money lying around? The good news is, you don't need a huge budget to revive an outdated kitchen. With some strategic updates and DIY elbow grease, you can transform your kitchen from dated and dreary to fresh and functional. Here's how we gave our kitchen a budget-friendly facelift.
Assess Your Existing Kitchen
First, take a hard look at your current kitchen to identify areas needing improvement. Make a list of what you like and dislike about the space. Is the layout inefficient? Do appliances or cabinets need replacing? Which surfaces are worn or damaged? Consider how you use the kitchen and any problem spots in the workflow. This evaluation will help you recognize priorities and focus your makeover budget where it counts.
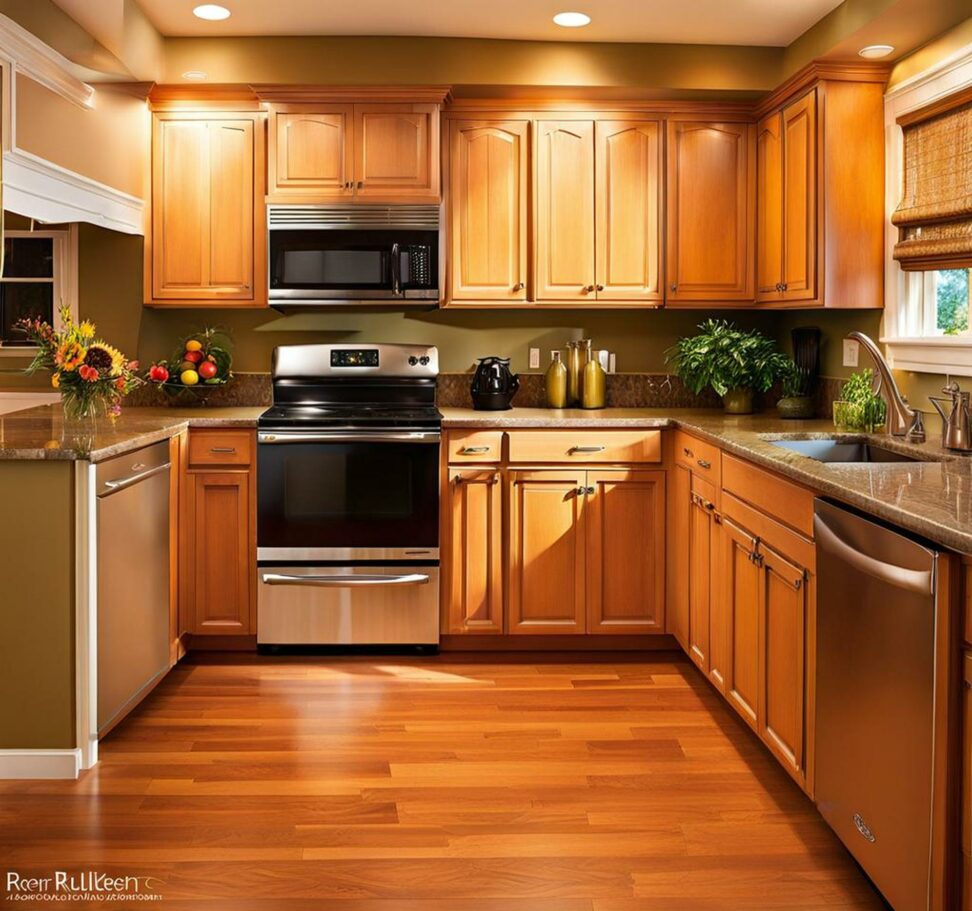
We realized our closed-off galley kitchen lacked prep and storage space. Appliances were functioning but looked straight out of the 80s. Oak cabinets had seen better days, and the laminate countertops were chipped and dingy. Our style goal was a fresh, modern cottage look on a tight budget.
Set Your Budget
After assessing your needs, establish a realistic remodel budget. Costs add up quickly, so focus on improvements providing the most bang for your buck. In our kitchen, new cabinets or countertops would've blown our budget. Instead we prioritized smaller upgrades like new hardware, a backsplash, and lighting. Figure out must-haves versus nice-to-haves.
Research expenses for materials and appliances. Get quotes from contractors if needed. Consider DIYing portions of the work, like painting cabinets or demolishing old counters and backsplashes. Budget extra for unexpected issues. Setting a clear budget upfront prevents overspending halfway through the project.
We earmarked $2,000 total, hoping to DIY as much as possible. New appliances were postponed to a future phase. We reserved the bulk of our budget for countertops, backsplash, hardware, and lighting.
Make a Layout Plan
Optimizing your layout is one of the most impactful updates. Evaluate existing work triangles, storage, and traffic flow. Could adjusting appliance locations or knocking down a wall improve efficiency? Accommodate multiple cooks with an island or peninsula.
We shifted our stove location to alleviate a cramped work triangle. A new peninsula created extra prep space and defined the cooking zone. But since major construction wasn't possible, we kept existing cabinet footprints and focused on refreshing finishes.
Creative Solutions for Small Kitchens
Limited room can make remodeling tricky. These clever tips maximize function and style without an expensive layout overhaul:
- Add an island or peninsula cart on casters for flexible extra space
- Swap a wall oven and cooktop for a more compact slide-in range
- Install narrow shelving on the wall around windows and appliances
- Opt for counters that visually recede like white, light granite, or butcher block
- Use glass cabinet doors and open shelving for a lightweight look
- Include mirrored backsplashes to visually expand the space
Update Surfaces
Dated counters, backsplashes, and floors can make any kitchen look tired. Luckily, surface upgrades provide big visual impact without moving walls or plumbing. First, freshen up dingy cabinets with a coat of paint or new doors and hardware.
Replace worn laminate countertops with durable and economical options like butcher block, concrete, or stained wood. If your budget allows, sleek quartz or granite countertops add style. DIY peel-and-stick tile, beadboard, or removable wallpaper make quick, affordable backsplash upgrades. Then swap worn vinyl or linoleum floors for budget-friendly laminate or vinyl plank flooring.
We painted the oak cabinets white and replaced old hardware with brushed nickel pulls. After installing a white quartz peninsula top, we chose wood-look porcelain tile flooring. The white subway tile backsplash complemented our classic farmhouse sink.
Cost-Effective Counter and Backsplash Options
Splurging on pricy countertop materials like quartz or marble isn't always feasible. Consider these budget-friendly alternatives for surfaces with lots of visual appeal:
- Butcher block - Warm, natural option perfect for cottage kitchens
- Concrete - Industrial vibe; can be stained, etched, or painted
- Tile - Highly customizable using different colors, patterns, shapes
- Laminate - Affordable option; wide variety of wood and stone looks
- Stained wood - Coordinates with shaker cabinets; oil finish is low maintenance
- Beadboard - Classic cottage look for backsplashes and even counter accents
- Removable wallpaper or tile - Peel-and-stick backsplash; easy to install and change
Swap Out Appliances
Replacing major appliances provides major impact. Outdated refrigerators, stoves, and ovens not only look bad but operate less efficiently. If your budget allows, install new energy-saving models. Shop sales and retail outlets for discounted quality appliances.
Small upgrades like a microwave, instant hot water tap, or wine fridge customize your kitchen without breaking the bank. Blend stainless steel appliances with classic white for a transitional vibe. Clean appliances also lend a fresh, modern feel.
Our avocado green appliances screamed 1970s. But new stainless appliances just weren't in the budget this round. We opted to keep appliances clean and deal with upgrades later.
Repurposing Old Appliances
Throwing away old appliances creates unnecessary waste and expense. Before replacing, consider repurposing or finding used models new homes:
- Donate functioning appliances to Habitat for Humanity, churches, etc.
- Sell on Facebook Marketplace, Craigslist, OfferUp, etc.
- Repurpose old stoves as standalone grills, potting benches, or storage islands
- Use the fridge or freezer in the garage or basement if still running well
- Remove doors on the fridge or oven to convert into shaker-style cabinets
Install Storage Solutions
Even in a modest kitchen, smart storage is key. Start by editing items and organizing existing cabinets. Supplement with new organizational products - trays, dividers, racks, and containers customized to your needs. They'll help corral everything from pans to spices.
Open shelving offers a lightweight, budget-friendly storage option. It works well in cottage or farmhouse kitchens for frequently used items. For extra space, try a rolling cart or hanging pot rack. Don't overlook unused corners - they're prime for angled blind corner cabinets or pull-out shelves.
In our galley kitchen, storage was severely lacking. We added a DIY pan and baking sheet organizer in a lower cabinet. Above the peninsula, open shelves held white dishware. A small rolling cart provided extra surface area and storage by the fridge.
Update Lighting
Lighting instantly elevates a kitchen's style while improving function. Consider adding fixtures like sleek pendant lights, industrial bar lighting, or modern flush mounts. Under cabinet lighting illuminates tasks without sacrificing precious counter space.
Make sure lighting adequately covers key workstations like food prep and cooking areas. Incorporate dimmers to set the perfect ambiance for meals or entertaining. Our dated fluorescent box lighting got swapped out for industrial-style pendants over the peninsula and sleek under cabinet LED strip lights.
Lighting Tips for Small Kitchens
Since lights take up precious space in a small kitchen, follow these tips:
- Stick to 3 or fewer pendant lights to avoid visual clutter
- Use recessed cans for ambient lighting; pair with task lighting as needed
- Try sconces or vertical under cabinet lights on walls to save space
- Incorporate mirrors and reflective surfaces to bounce and amplify light
Refresh With Paint
A fresh coat of paint is an affordable way to instantly revive your kitchen. For the biggest impact, paint or reface cabinets and replace the hardware. Choose durable, wipeable cabinet paint in gloss, satin, or semi-gloss finishes.
Painting walls, trim, and ceilings also contributes to a feeling of brightness and renewal. Neutral whites and soft greys are safe bets for small kitchens, as they recede to visually expand the space. Pops of color on an accent wall or island provide character without overwhelming.
We spray-painted the oak cabinets white and replaced old hardware with new brushed nickel pulls. Soft gray lower cabinets complemented the bright white uppers. For an accent, we painted inside the new open shelves a light teal.
DIY Cabinet Painting Tips
Painting cabinets seems daunting but can be DIYed following these tips:
- Remove doors and hardware for easier painting
- Thoroughly clean and sand surfaces to help paint adhere
- Use angled mini rollers and brush for hard to reach areas
- Allow proper dry time between coats as specified by the paint product
- Finish with a protective sealer or polyurethane for added durability
Style on a Budget
The finishing touches like hardware, accents, and styling bring everything together. Don't spend lavishly just to follow trends - classic elements with contemporary pops create better longevity. Mix metal finishes like brushed nickel, black, and oil-rubbed bronze for an eclectic edge.
Incorporate your personality! Add pops of color with small appliances, dishware, or decorative accents. Fresh greenery like herb gardens also lend character without big expense. Overall, maintaining a cohesive design with new and existing items prevents your budget makeover from appearing disjointed.
We tied our space together using black metal hardware, white dishes displayed on open shelves, and green accents. Our peninsula stools brought needed color. Wood open shelves, ceramic canisters, and a jute rug added natural texture to balance sleek counters and subway tile.
Economical Styling Strategies
Freshen up your newly renovated kitchen without overspending using these savvy styling tricks:
- Display collections of colored glassware or vintage finds
- Use baskets, trays, and bowls to corral items on counters and shelves
- Incorporate greenery with herb gardens, plants, and floral arrangements
- Add pops of color with mix-and-match dish towels, rugs, and small appliances
- Select warm metals like brass, gold, and bronze for hardware and lighting
- Layer rug textures and materials - jute, cotton, woven
When tackling a budget kitchen renovation, the key is making strategic improvements with maximum visual impact. Focus on areas that are dated, worn out, or create inefficiencies. Establish priorities like surfaces, storage, appliances, and lighting that align with your budget.
Mix old with new so improvements don't appear disconnected from what remains. Maintain harmony through color schemes, finishes, and style elements. Work in phases if needed, as even modest changes like paint, hardware, and lighting revive a tired kitchen. Dream big, but resist going overboard on trends unlikely to stand the test of time.
The results are worth the effort. No longer will you cringe walking into an outdated kitchen that makes you want to run the other way. You'll now love spending time cooking, eating, and relaxing in your fresh, functional space tailored to your needs and style.
We're thrilled with the new lease on life our kitchen now enjoys. The improvements transformed an uninspiring space into our favorite room in the house. Now it actually feels like our home.
You can revive your outdated kitchen with some planning and elbow grease. Define your priorities, stick to your budget, and get ready to fall in love with your kitchen all over again!