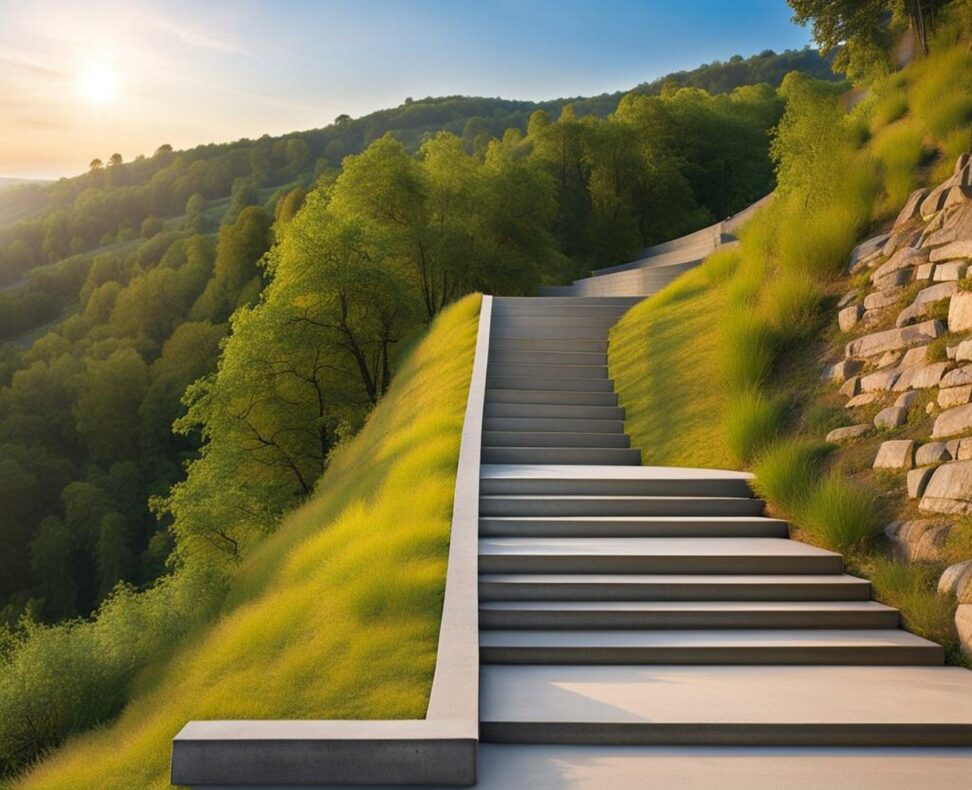
Make Your Hill Climbable With Well-Planned Concrete Steps
Do you have a beautiful hillside property that is difficult to access due to the steep slope? Installing thoughtfully designed concrete steps is an excellent solution to make your yard more usable and create an attractive landscape feature. With proper planning and construction, concrete steps allow you to comfortably ascend and descend through your sloped backyard. Read on to learn the ins and outs of conquering your hillside with sturdy, low-maintenance concrete steps.
Assess Your Hillside's Slope, Length and Height
The first step in planning concrete steps for your yard is to thoroughly analyze the existing terrain. Consider the overall incline or gradient of the slope. Use a clinometer or smartphone app to measure the steepness. Most steps function best on slopes between 30-40 degrees. Greater than 50 degrees, and the steps may need to be winding or tiered. Under 30 degrees, and standard steps should suffice.
Next, evaluate the total rise and run - how much elevation you need to ascend and the linear distance to cover. For example, your slope may rise 8 feet over a run of 20 feet. These measurements are key for calculating ideal step dimensions. Also account for issues like drainage and soil stability. Signs of erosion indicate you may need retaining walls or drainage ditches to securely anchor the steps.
Calculating Rise and Run
For comfortable and safe concrete steps, keep the rise (height) between 5-7 inches. The run (tread depth) should be around 12 inches. This amounts to a ratio of around 6:12 to 7:12 rise over run. On gradual hills, you can make the rise taller and run shorter. For steeper slopes, decrease rise and add length to the run.
Aim for steps with consistent dimensions. But some variance looks natural, so exact uniformity is not critical. Also consider adding an extended run every 5-10 steps as a short landing to break up lengthy runs.
Choose the Best Concrete Type for Your Steps
For hillside steps, poured concrete and precast concrete slabs are suitable options. Poured concrete involves building forms, reinforcing with rebar, and pouring the concrete to harden on site. Precast uses premade concrete slabs lowered into place. Weigh the pros and cons for your project.
Poured concrete offers a seamless, monolithic look. You can incorporate custom colors and finishes. But forms must be built and extensive site work is required. Precast slabs are quick to install and you can still finishing them on site. But joints are visible and sizing is limited to what's available.
In terms of appearance, consider options like stamping patterns into concrete for textures like stone, slate, or brick. Staining concrete or using color additives creates different hues and visual interest. For a sleek look, a plain gray concrete surface works as well.
Reinforce Steps for Added Stability
Reinforcing concrete steps helps prevent cracking, shifting, and other structural issues. For poured concrete, use #4 rebar rods wired into a grid pattern before pouring. A 6x6 inch grid usually provides sufficient reinforcement. For precast concrete slabs, a steel wire mesh works well.
On softer ground or steep slopes, consider partially burying thicker concrete footings under the steps to anchor them in place. In extreme cases, piers can be drilled deep into the hillside for reinforcement. Proper reinforcement ensures your steps remain stable for decades.
Design Appealing and Functional Steps
When designing your step layout, consider both form and function. Do you want straight and formal steps or winding steps for a natural stone staircase look? Winding steps work especially well on steeper hills, with gentler rises and runs that are easier to climb. But straight steps maximize usable yard space.
Think about flow and transitions. How can you seamlessly blend the steps into the existing landscape? Use slopes, curves, and plants to integrate them rather than an abrupt staircase. Also consider how steps will coordinate with other hardscapes like patios or gardens.
For long ascents, incorporate periodic landings or small terraces to break up the climb. Aim for landings every 8-12 steps. The extended run offers a brief rest spot and prevents a cramped, narrow feeling.
Enhance Safety With Railings and Lighting
It's smart to install railings on at least one side of concrete steps higher than 30 inches. Local building codes likely require railings for added safety. Materials like steel, aluminum, or stainless cables work for a sleek modern look. Or opt for wooden railings in natural tones for a rustic style that blends into the landscape. Match railings to the look you want.
Proper lighting is another way to improve safety on concrete steps, especially if they are winding or on a slope. Low-voltage stair lighting recessed into risers illuminates tread depth changes at night. Handrails with built-in LED strip lighting are another option. Lighting prevents falls and creates a magical ambiance.
Build Landings on Top and Bottom
At the top and bottom entrance of concrete steps, build an ample landing area. Landings give you room to comfortably transition on and off the steps without feeling crowded. They also prevent water runoff and erosion issues by keeping soil back from step edges.
For deck-type stairs, landings should be at least 36 inches deep and as wide as the steps. On hillside steps, build landings at least 48 inches deep for maneuvering ease. You can integrate landings into patios, viewing areas, or gardens. Get creative with building functional spaces around step transitions.
Finish Steps for Aesthetics and Traction
Apply the appropriate concrete finishing techniques for your desired look and performance. First ensure surfaces are smooth. Use a magnesium float for an even texture. Score joints between consecutive steps for decorative effect.
For optimal traction, consider a broom finish. While the concrete is still wet, lightly drag a broom head across the surface. This creates subtle grooves and traction but preserves a smooth look. Stamped concrete is another way to add traction through imprinted textures.
Color concrete as desired during pouring using oxide pigments or liquid colorants. Stain cured concrete via chemical reactions for more color options like reddish terra-cotta tones. For glossy steps, apply concrete sealants. Finishing creates both aesthetic appeal and slip-resistant steps.
Maintain Steps Over Time
Keep your concrete steps looking like new with proper maintenance. Remove stains or discoloration with commercial concrete cleaners and stiff scrub brushes. Reseal surfaces every 2-3 years to protect from moisture damage.
Check steps occasionally for signs of cracking, shifting, or crumbling, and repair promptly. Settling soil or erosion can destabilize steps. Vegetation growth in joints also hastens cracking by widening gaps. Keep steps clear of heavy vegetation.
In cold climates, prevent moisture and salt from causing pitting or cracks by keeping steps clear of snow and ice buildup. Avoid using salt or aggressive ice melting chemicals. With regular care, quality concrete steps will serve you well for decades.
Installing elegant, functional concrete steps makes your hillside yard easily accessible and adds striking hardscape interest. Thoughtful planning of the layout, materials, safety features and finishes results in durable steps tailored your property's unique landscape. Set aside adequate time for proper site evaluation, design considerations and high-quality construction. With concerted effort invested upfront, concrete steps on a slope can become a beloved backyard asset your family enjoys for generations rather than an intimidating challenge. Which ideas from this article resonate most for your hillside step project? Let the terrain inspire your creative vision as you shape concrete into a personalized staircase sculpture.