Build the Perfect Deck Gate in 9 Simple Steps
Adding a gate to your existing deck can provide both aesthetic enhancement and crucial safety benefits. A stylish gate keeps pets and little ones from wandering off while allowing you to control access to your deck. With the right planning and materials, you can build a functional gate that seamlessly matches your deck's look. Follow these nine straightforward steps to construct a durable, attractive gate your family will enjoy.
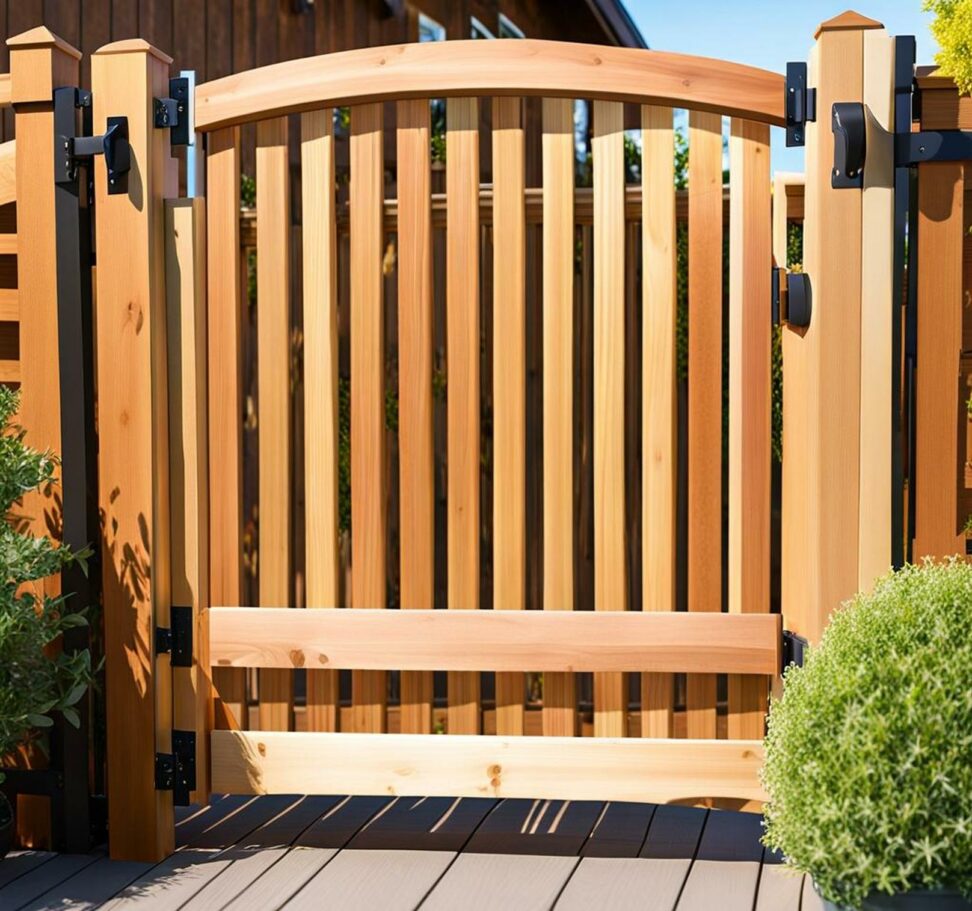
Step 1: Choose the Right Materials
It all starts with choosing wood that can withstand the outdoor elements. Pressure-treated lumber is the optimal building material, as it resists rot, insects, and other damage. Let the wood acclimate to the environment for at least 72 hours before starting your project. This allows the wood to adjust to humidity levels to prevent warping or twisting as the gate ages. Cedar and redwood are naturally weather-resistant options as well.
In addition to lumber, gather galvanized steel hardware, including sturdy gate hinges and an exterior-grade latch. Stainless steel offers an extra level of strength and durability. You'll also need exterior wood screws, nails, weatherstripping, and wood sealant or stain.
Step 2: Measure and Cut Pieces to Size
Take careful measurements of the deck opening where you plan to install the gate. Account for the exact height and width. Be sure to leave a 1-inch gap on all sides of the gate frame for hinges and the latch. Cut your lumber to the appropriate lengths and widths for the gate rails and posts based on your measurements. Having properly sized pieces ensures a good fit.
Step 3: Build the Gate Frame
Construct a sturdy frame by cutting 45-degree angles on the ends of the gate rails and attaching them to the posts using exterior screws. This clever picture-frame design provides stability and keeps the gate square. Use at least three screws per joint for optimal strength. Apply wood glue at the joints as well for added durability.
Step 4: Add and Space Balusters
Cut balusters, or pickets, to your desired length and space them no more than 4 inches apart between the rails. This prevents kids and pets from slipping through. Secure balusters with exterior screws and glue. Work your way across the frame, filling it with uniformly spaced balusters until you reach the desired style and safety.
Step 5: Install the Gate Hardware
Mount heavy-duty gate hinges using exterior screws. Attach one leaf of the hinges to the gate frame and the other leaf to the deck post. Place hinges high enough so the gate won't drag. Install a latch at a comfortable height. For added security, use a locking latch or childproof mechanism to prevent unsupervised access.
Step 6: Hang the Completed Gate
With hinges and latch attached, you're ready to hang the finished gate. Have a helper support the weight while you position the gate in the opening. Insert screws in the hinge barrels to secure the gate in place. Test opening and closing and make any needed adjustments before finalizing the install.
Step 7: Add Supports and Decorative Touches
Optional supports and design elements can complete your gate build. Install a diagonal cross brace on the back for added rigidity and to prevent sagging. Affix decorative gate stop molding to protect your deck and achieve a polished look. For nighttime ambiance, add post cap lights or hardware with solar accents.
Step 8: Weatherproof the Gate
Ensure your wood gate withstands the elements by sealing it properly. Use an exterior-grade wood stain or sealer to protect from weathering. Apply weatherstripping around the gate's perimeter to seal gaps where rain or wind could penetrate. Maintaining proper weatherproofing helps your gate last for years.
Before enjoying your new gate, do some final safety tests. Inspect for rough edges or hardware issues that could snag clothing or cause injury. Ensure all gaps meet local safety codes for child and pet access. Test the latch operation and gate swing direction. Make any final adjustments to maximize safety and access control to your deck.
A custom deck gate is possible with smart planning, careful assembly, and the right materials. Match your new gate's style to your existing deck for a cohesive look. And don't forget small touches like weatherproofing and safety checks to ensure it functions properly for years of backyard enjoyment.